
ELECTROPLATING
The process of coating a material with a metal using electricity.
Ok, there’s a little bit more to electroplating than coating a material with a metal using electricity, that but essentially it’s using electricity to deposit a metal onto another surface.
The chemistry involved can be quite detailed and dependant upon what specific process being performed, these pages will give the viewer and greater understanding of electroplating without the details which may well have been forgotten many years ago from what invariably may well have been just a couple of hours science lesson at school.
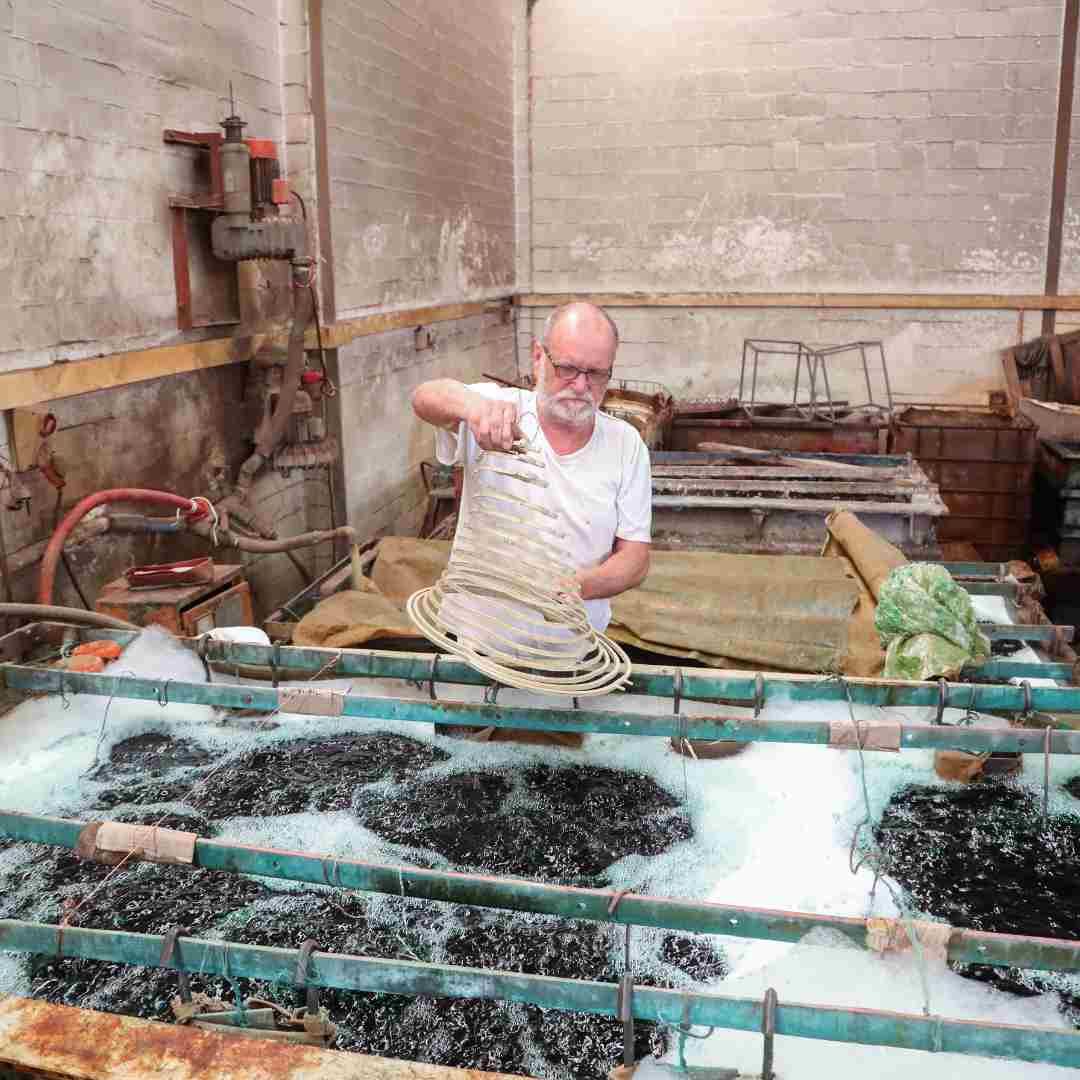
You cant beat professional work:
Whilst the best way to get a professional finish is to send your parts to a professional electroplater, often the practicality and cost involved is restrictive. More common for todays home plater is the fact that parts are small and easily lost and frequently hard to replace. Home and hobby plating is becoming more and more popular . Whether it’s for one-off projects or more frequent use, this site may well be the answer!

The Process
What do I need?
Whatever plating process you are planning, your work will need to be clean. There are many ways in which you can clean your parts before plating but the process should NEVER be taken lightly and replacing formulated products for “something I’ve got in the shed” is rarely worth it. A good cleaner will be one of the cheapest purchases a home plater can make but one of the most important
Rinse
Once your work is clean you will need to ensure that it is thoroughly swilled before moving to a subsequent process -in fact it is important to note that your parts will nearly always need to be swilled thoroughly between processes. It is therefore extremely important to ensure that you have an appropriate swilling method and what’s more, ensure that you read and understand all process instructions before use.
Power
One thing your electro plating will need is electricity! Power, more importantly, current is what makes the magic happen! Electroplating is carried out industrially by using very large rectifiers which can produce the right amount of current for large amounts of work. The home plater, using a standard domestic supply is never going to be able to plate large parts as the current required is simply too high, but small parts can quite easily be plated using small power supplies and many users employ quite crude methods yet get some great results. Ideally home platers should be using a controllable power source which enables current adjustment, however with a bit of experimentation and know-how many use battery chargers to great effect. Remember that electricity clearly has its dangers and should not be taken lightly -always employ an appropriate and safe method of power supply.
Along with numerous tanks to hold your solutions you may need to heat and agitate your solution. Certain plating solutions need to be warmed to produce decent results and some will also need agitation. Agitation can be done in the form of mechanical movement of the solution or more often by using air bubbling over the work which allows a more even deposit over the plated part.
Once you have your equipment there are some important chemical salts you need to produce an “electrolyte”. Electrolytes are available pre-mixed or can be blended on-site and are used as a source of metal within the solution and also as a means of conductivity to allow current to pass through solution and allow the metallic deposit on your part. As plating is performed, the balance of the solution will change and therefore additions will need to be made.
The solution is made conductive with the use of an anode and a cathode. The cathode is the negative electrical connection and in electroplating, the cathode is connected the the parts which are to be plated. The anode however, is the positive terminal and should be connected to a sacrificial anode made of the deposited metal. For instance in nickel plating we use a pure nickel anode and in zinc we use a pure zinc anode.
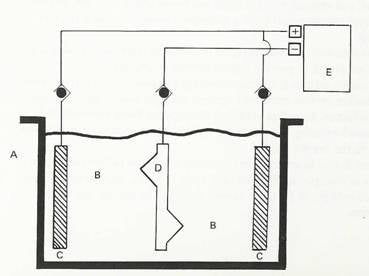
Effective plating diagram
This picture shows a very basic diagram of a plating tank. Here we can see what is required for effective plating.
Our tank “A” should be suitable for purpose and not too small but not too big either! The tank should be sized according to the work being carried out and the solution volume used - do not use large volume solutions if you will only ever electroplate 1 or 2 small parts at a time.
The plating solution “B” or electrolyte, is made from appropriate salts for the process being carried out and is of sufficient volume to cover all parts within the solution. Anodes “C” should also be covered by the solution and placed at opposing sides of the tank with at least 2 at opposite sides. The part to plated “D”, is immersed fully in the solution and placed equidistant from each anode. Power is supplied at “E” with positive anodes and the plated part “D” connected to the negative connection.

Contact us
Whilst there is a lot of information available online, we will try not to overload users of this web site with information which may not always be needed, so if there is a question you may have regarding you electroplating, please feel free to contact us.
